
Bread, a staple in diets worldwide, is both an art and a science. Its simplicity hides a complex process, where precision meets creativity. This article takes you on a journey through the essential steps of bread making, providing tips to elevate your baking skills.
1. Kitchen Equipment: Professional vs Home
In any type of cooking and bread making especially it is essential to have the right equipment in your kitchen.
Professional kitchen equipment, including commercial kitchen mixers, is mostly designed for commercial purposes and heavy-duty use. Commercial mixers are built with durable materials to withstand frequent and prolonged usage, have large scale variety of sizes and often feature higher horsepower motors for efficient mixing of large quantities.
In contrast, home kitchen mixers are generally smaller in size and designed for occasional use in residential kitchens. They may have less powerful motors and a more compact design, focusing on versatility and ease of use for everyday home cooking
Both, commercial and home mixer, usually equipped with various attachments and have few speed settings to cover various culinary needs. If you think of ordering a right commercial kitchen mixer, visit https://sts-global.com/
2. The Foundation: Understanding Flour Types
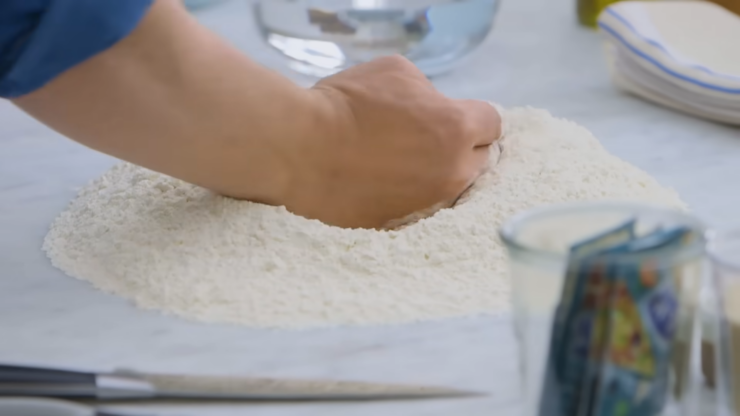
Flour, the key ingredient of bread, comes in various types, each lending unique characteristics to the final loaf. Common flour types include all-purpose, bread, whole wheat, and rye.
Bread flour, with its higher protein content, creates a chewier texture due to more gluten development. Whole wheat flour offers a nuttier flavor and denser texture but can be challenging to work with due to its lower gluten content.
Mixing flours can balance flavors and textures, allowing for personalized creations. If you are a restaurant owner or make homemade bread, you may find it challenging to make the dough daily as it is a tiring process.
For an easier mixing of ingredients and better quality of final product it is highly recommended to use a commercial mixer in your bread cooking process.
3. Water: The Catalyst of Transformation
Water activates yeast and gluten, two key players in bread making. The amount of water used, often referred to as hydration, significantly impacts the dough’s consistency and the bread’s texture.
Higher hydration leads to a more open crumb and a crispier crust, ideal for artisanal loaves like ciabatta. Lower hydration results in a tighter crumb, perfect for sandwich bread. Temperature is also critical; lukewarm water (around 110°F) is ideal for activating yeast without killing it.
4. Yeast: The Living Ingredient
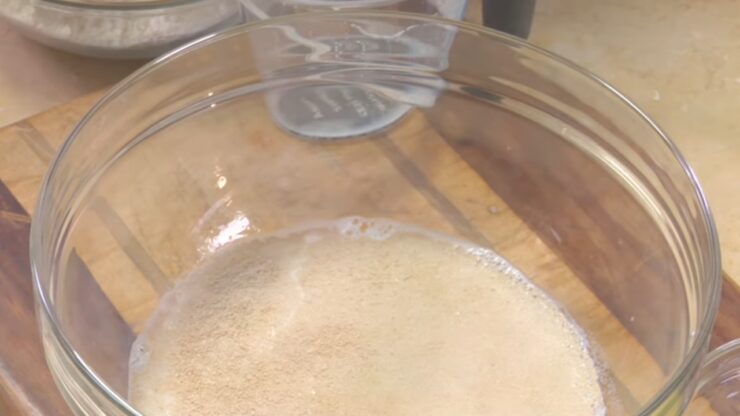
Yeast, a living organism, is the heart of bread making. It feeds on the sugars in flour, producing carbon dioxide and alcohol, which cause the dough to rise and develop flavor. There are two main types of yeast: active dry yeast and instant yeast.
Active dry yeast needs to be dissolved in water before use, while instant yeast can be mixed directly with dry ingredients. The amount of yeast and rising time can vary depending on the desired outcome. Longer fermentation at cooler temperatures develops more complex flavors.
Similarly, in other culinary applications, like addressing health concerns, individuals have explored the use of baking soda, known for its versatility, even in the context of managing yeast infections.
5. Salt: More Than Just Flavor
Salt plays a dual role in bread making: flavor enhancement and yeast regulation. It strengthens gluten structure, improving the bread’s texture. However, adding too much salt can inhibit yeast activity, so balance is key. Typically, a ratio of 2% salt to flour is used.
6. Kneading: Developing Gluten
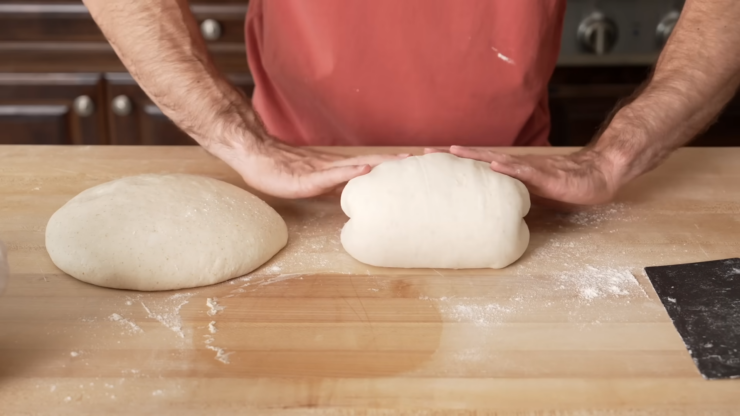
Kneading the dough develops gluten, which gives bread its structure and chewiness. The process involves folding, pressing, and stretching the dough, aligning the gluten strands.
Kneading can be done by hand or with a mixer, but the goal is the same: a smooth, elastic dough that passes the “windowpane test” – a thin, translucent stretch when a small piece of dough is pulled apart. Over-kneading can lead to tough bread while under-kneading results in a crumbly texture.
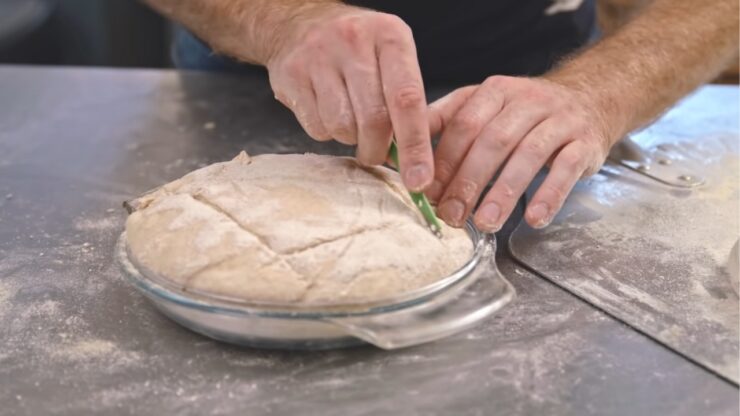
7. Shaping and Proofing: The Final Steps
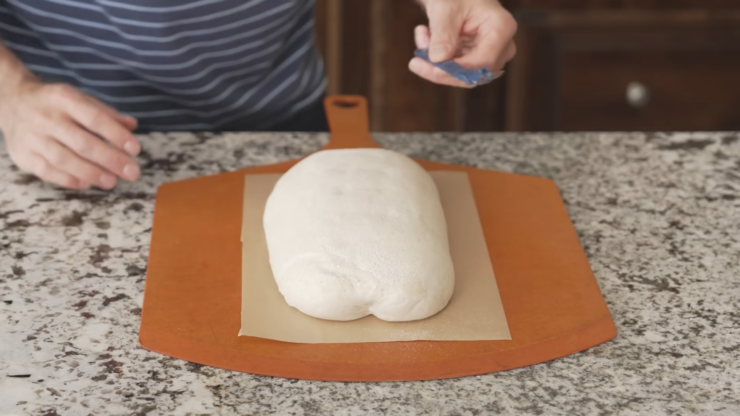
Before Baking
Shaping and proofing are crucial for achieving the desired size and texture of the bread. Shaping gives the dough its final form, whether a traditional loaf, baguette, or roll. Proper shaping creates tension on the dough’s surface, helping it rise uniformly.
Proofing, the final rise before baking, allows the dough to develop its final size and flavor. This step can vary in time, depending on the recipe and room temperature.
A proofed loaf will be puffy and, when gently poked, the indentation will slowly spring back. Over-proofing can cause the bread to collapse in the oven, while under-proofing leads to dense bread.
The Baking Process: Bringing It All Together
Baking transforms the prepared dough into a delicious loaf. Preheating the oven is essential for consistent baking. The initial high heat helps the bread rise rapidly, a process known as oven spring. Steam, created by adding water to a hot pan in the oven or using a dutch oven, helps the crust develop a glossy, crackly texture.
When selecting the right loaf pan for your baking needs, consider the 12 best loaf pans, as they can enhance the overall baking experience.
The baking time and temperature depend on the bread type. A basic loaf might bake at 350°F for about 30 minutes, while artisan breads often require a hotter oven, around 450°F, and shorter baking time.
The bread is done when it’s golden brown, sounds hollow when tapped on the bottom, and reaches an internal temperature of about 190°F to 210°F, depending on the type.
Experimenting with Ingredients and Techniques
Once you’ve mastered the basics, experimenting with different ingredients and techniques can elevate your bread-making skills. Incorporating ingredients like seeds, nuts, dried fruits, herbs, or cheeses adds new flavors and textures.
Experimenting with techniques like sourdough starters, preferments like poolish or biga, and different kneading and shaping methods can significantly impact the final product. Sourdough starters, for instance, introduce a tangy flavor and unique texture, while preferments can enhance the bread’s depth of flavor.
Handling Common Bread-Making Challenges
Bread-making can be unpredictable, but understanding common challenges helps in troubleshooting. If your bread is too dense, it could be due to under-kneading, insufficient rising time, or old yeast. A crust that’s too hard might result from over-baking or insufficient steam during baking.
Sticky dough can be a sign of high hydration or insufficient flour. Adjusting flour or water ratios and kneading techniques usually solve this issue. Keeping a baking journal can help track what works and what doesn’t, making it easier to achieve consistent results.
The Role of Patience and Practice

Patience and practice are key to mastering bread-making. Each step, from mixing to baking, requires attention and respect for the process. Time is a crucial ingredient, as rushed bread often leads to inferior results.
Practice not only improves technique but also intuition – the ability to understand how different factors like humidity, flour type, and fermentation time affect the dough.
Summary
Breadmaking is a rewarding journey. It’s not just about following a recipe, but understanding how each ingredient and step contributes to the final loaf. The joy of pulling a fresh, homemade loaf out of the oven is unparalleled, and the skills learned through bread-making extend to many other culinary adventures. Embrace the process, experiment, and enjoy the delicious results of your labor.